
Creating Predefined Comments for Positive Responses
We'll guide you through the process of enabling custom comments for positive responses in the Admin App. This feature allows you to streamline communication and enhance user interactions. Follow these steps to make this happen:
- Log in to the Admin App
Begin by logging in to the Admin App with your administrative credentials.
- Locate the 'Locate Request' Form
Find the form named 'Locate Request' within the Admin App. This is where you'll make the necessary adjustments.
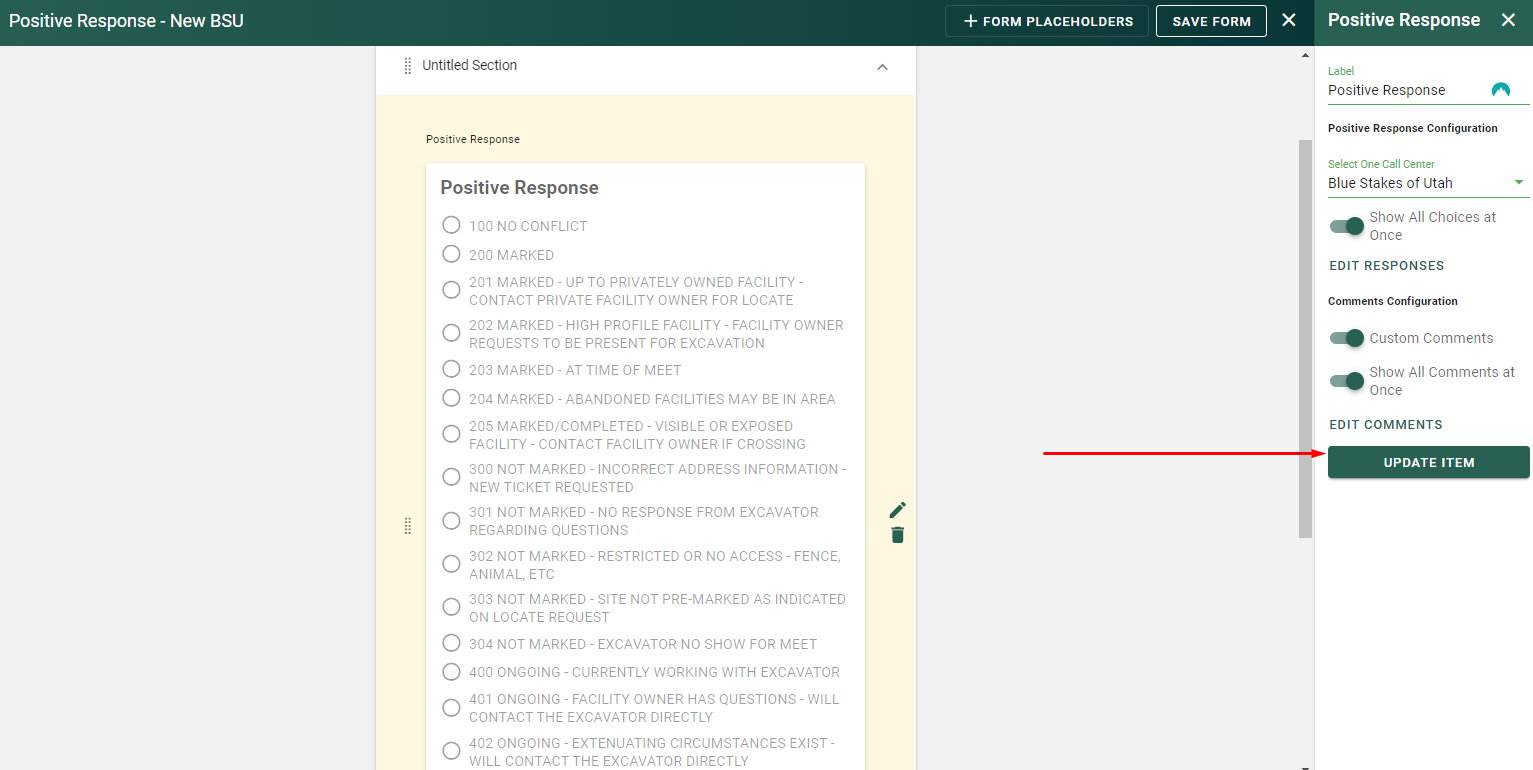
- Select the Positive Response Field
Inside the 'Locate Request' form, locate the positive response field. This is where you'll enable custom comments.
- Enable Custom Comments

- Click on Edit Comments
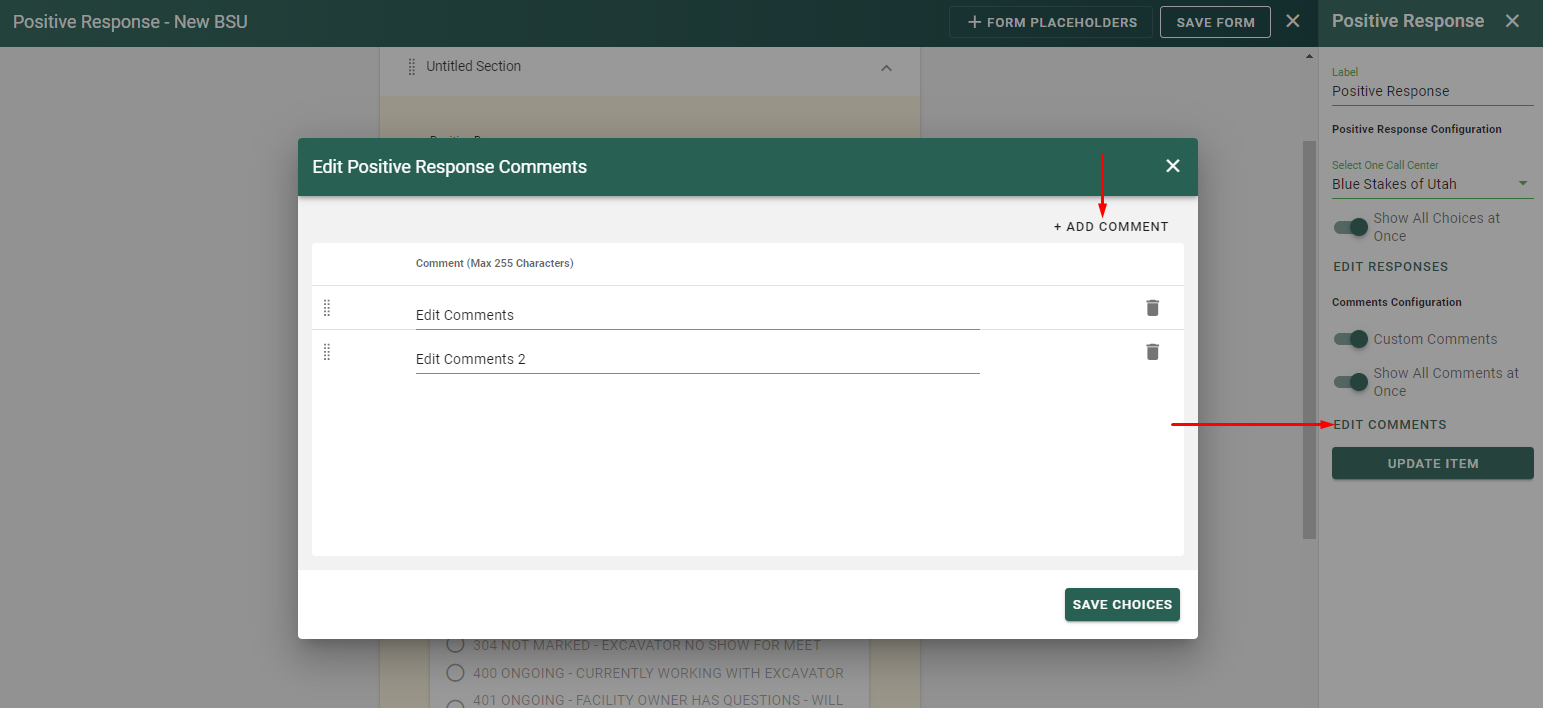
- Click on Add Comments
In the 'Edit Comments' section, click 'Add Comment' to create and customize your predefined comments.
- Click on Save Choices
- Enable 'Show All Comments at Once'
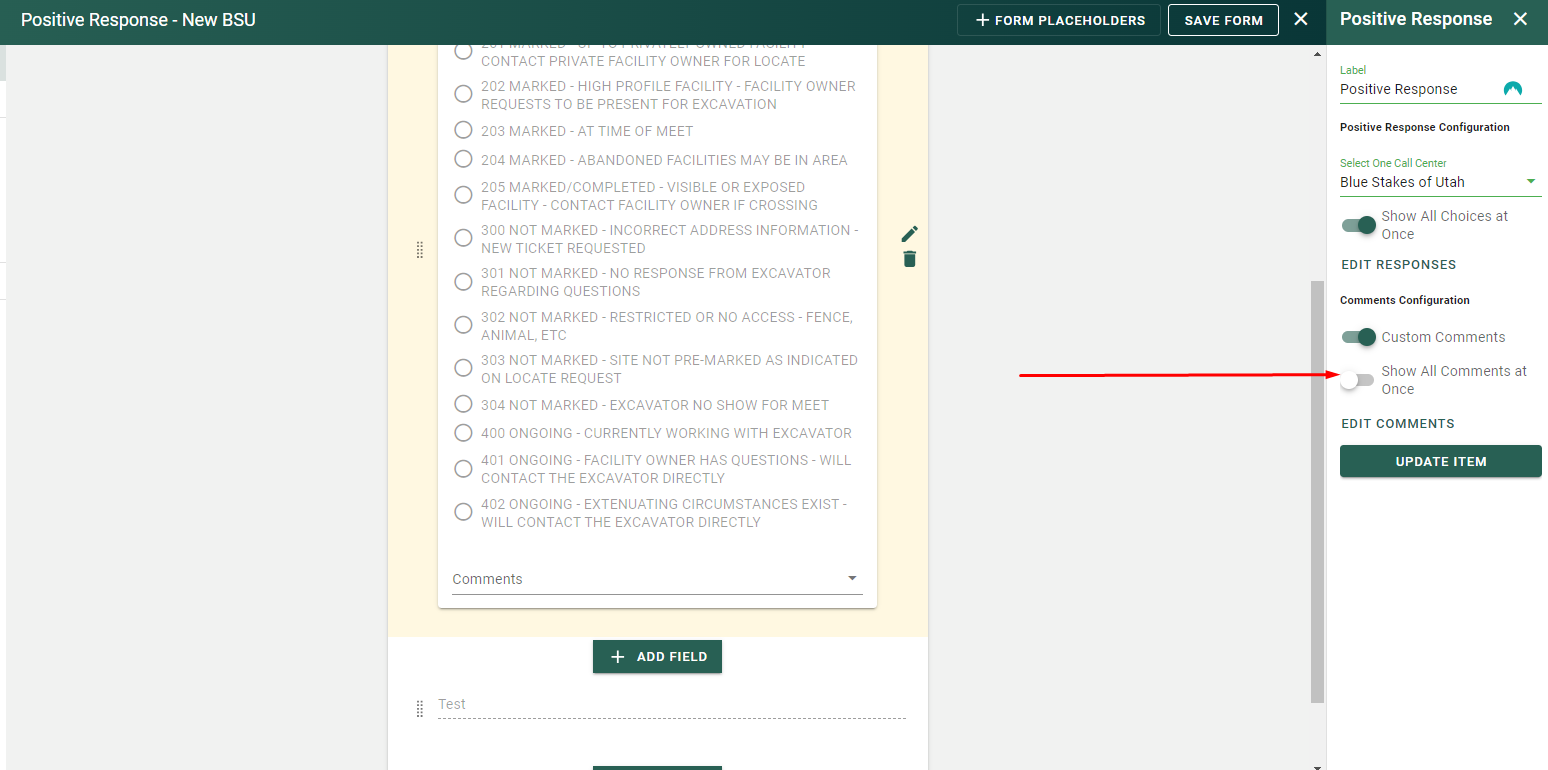
- Update Items and Save the Form
Finally, click 'Update Item' to confirm your changes and save the form.
By following these steps, you'll be able to enhance user interactions by enabling custom comments for positive responses in the Admin App. This feature provides a more efficient way to communicate and manage responses, ultimately improving your workflow.